Introduction
With Visual studio 2017 installation, Microsoft has changed the installation process by having new installation user experience which was designed to have
- Reduce the minimum footprint of Visual Studio
- Install/uninstall more quickly with less system impact
- Easier to select/un-select the features you want to install
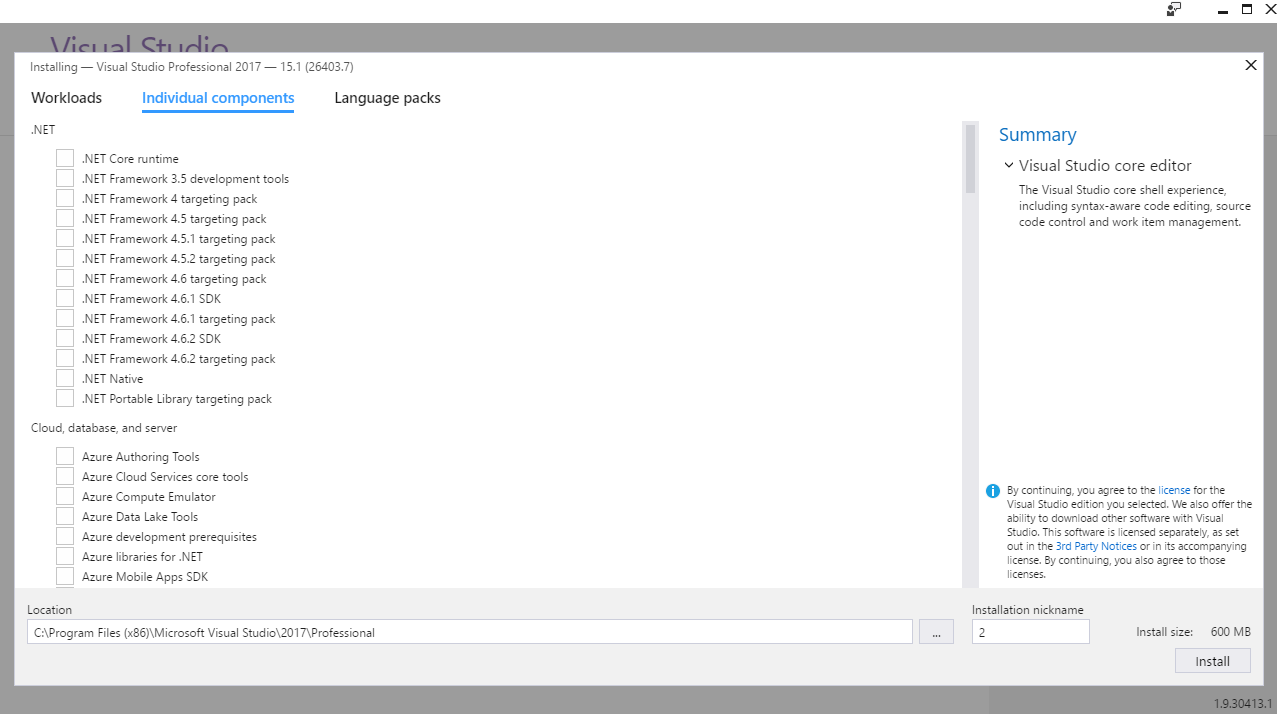
You can see below screenshots during first install of visual studio which is more user friendly and it has 3 tabs
Workloads
It separates the components with categories like Windows, Web & Cloud, Mobile and Gaming and Other Toolsets. We can select the required components from the list.
Individual Components
Select Individual components which you would like install from Individual components tab.

Language Packs
Select language pack which you would like to install. By default it is English.
Based on our selection of components from Workloads or Individual components it shows the installation size it takes on computer.
Feedback on Installer window:
We can “Report a problem’ or “Provide a suggestion” to Microsoft from installer feedback window from top right corner.
Installation Nickname
Now we can install Visual Studio Enterprise, Professional and Community editions side-by side on the same computer by providing “Installation nickname” from the Installer window (highlighted in below screenshot).
Example: If you install Visual studio Professional and Community Edition, provide the Installation nicknames as Profession/Community and on start menu it appears "Visual Studio 2017 (Profession)" and "Developer Command Prompt for Visual Studio 2017 (Profession)
Update Visual Studio
To update visual studio, run the visual studio installer file and click on update button if it appears.