Introduction
In this article, we will see how to deploy an ASP.NET Core Web application which is getting data from an SQL server to show data on a web page to Azure App Service and Azure SQL Database.
Azure App Service is a fully managed Platform as a Service (PaaS) that enables you to build and deploy web applications whereas Azure SQL is a cloud-based database service (PaaS) for hosting your relational databases on Azure cloud.
Sample Application
We have created a sample application and pushed it to GitHub. https://github.com/dotnetmirror/asp-net-core-sql-db-web-application/tree/master. Clone the application and run on your local machine.
The sample application connects to the database table and creates, reads, updates, and deletes (CRUD operations) certification tables to the database. Below is the localhost of view of the page during debug mode.
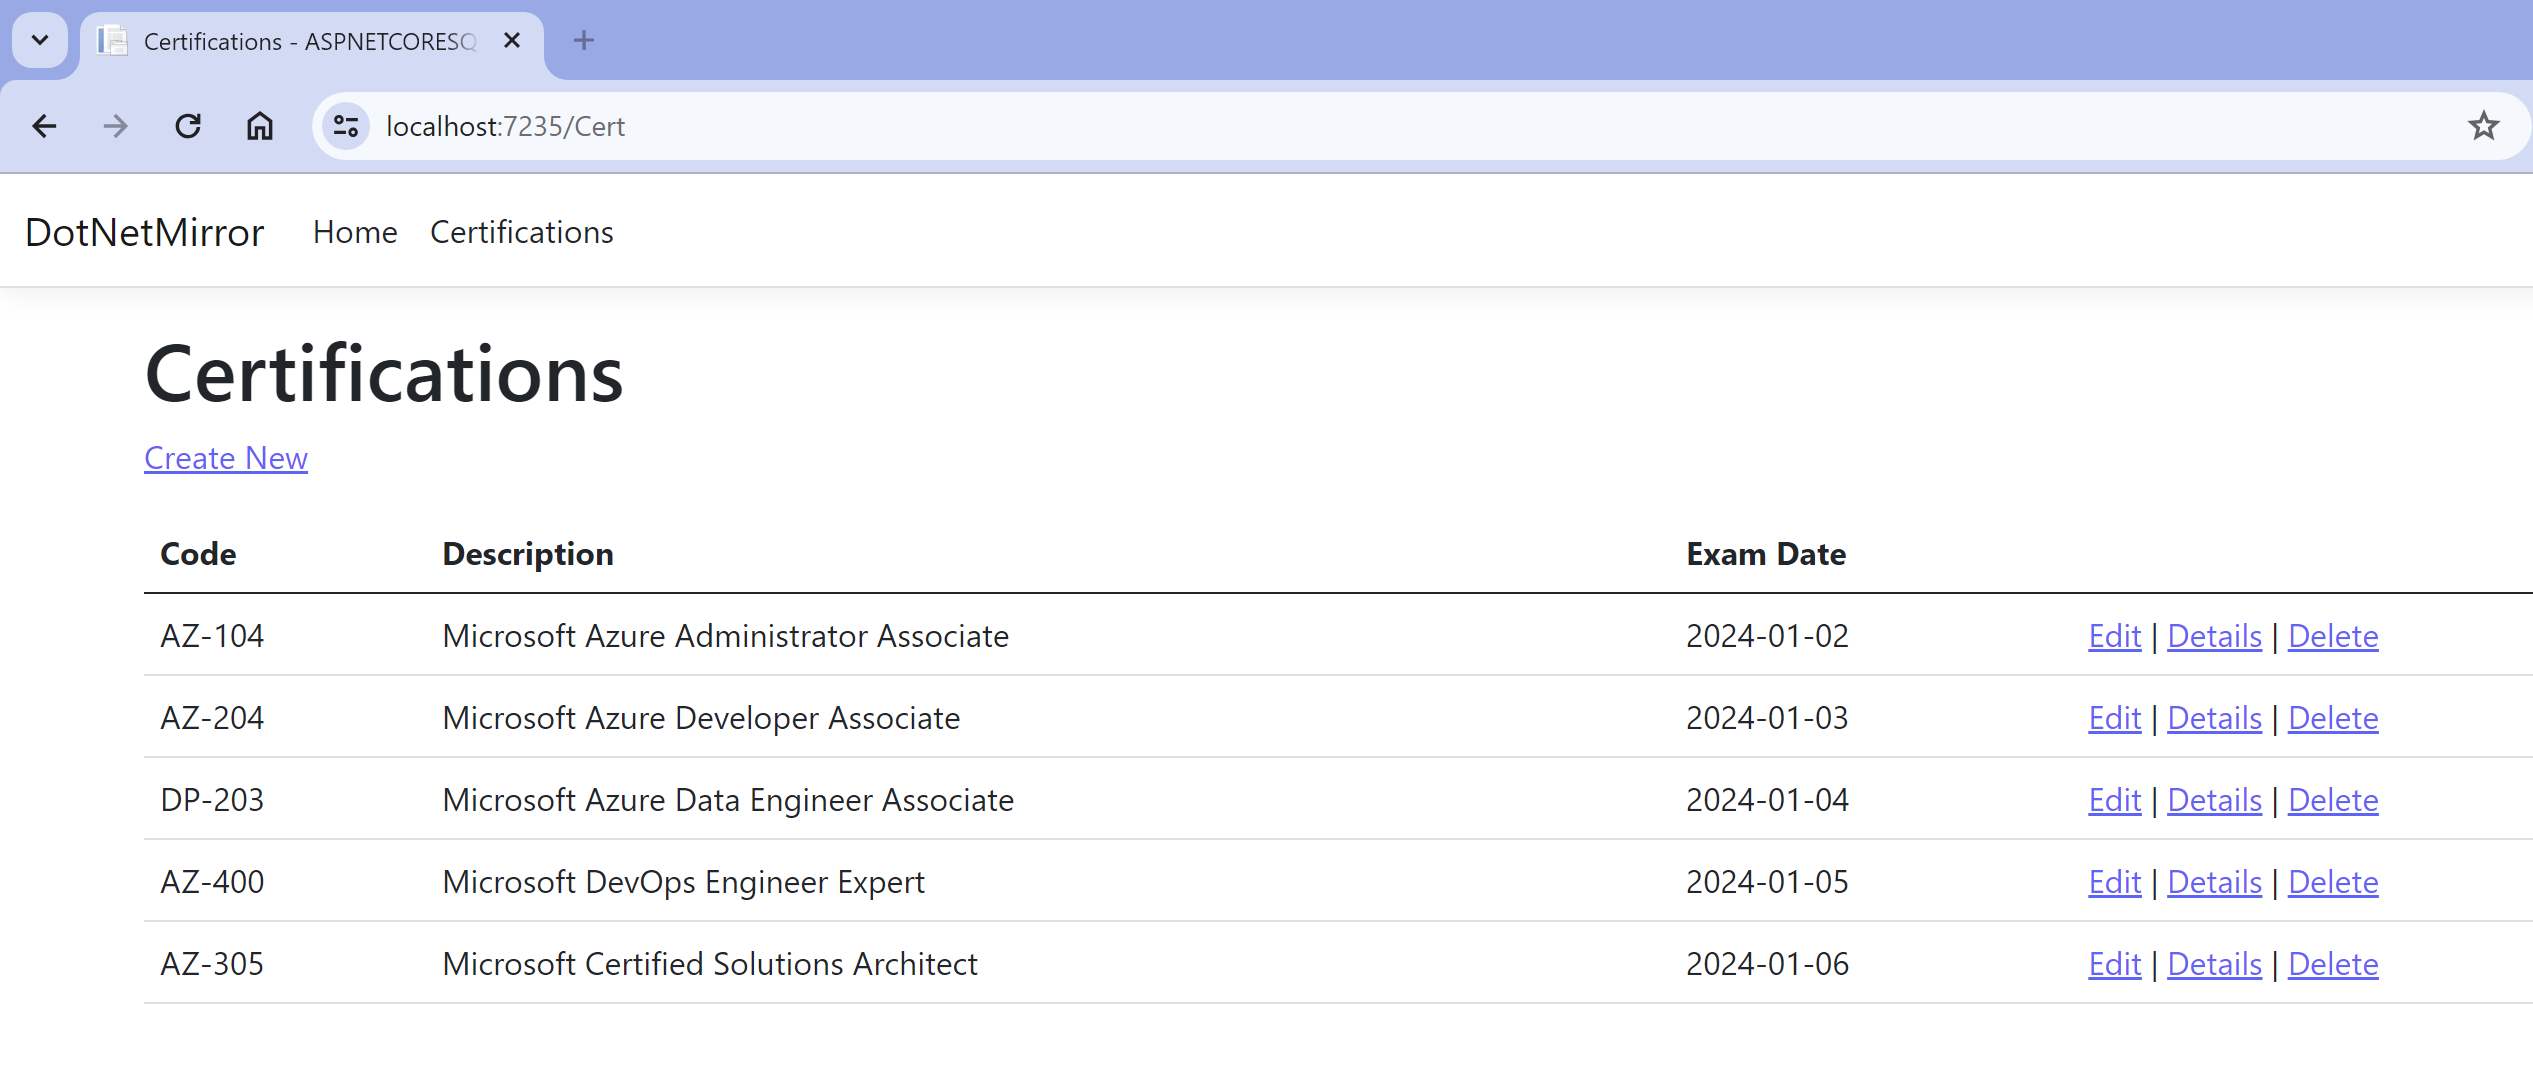
Fig 1 - localhost view of ASP.NET Core Web App getting certificate data from local SQL Server
Now let’s create Azure App Service and Azure SQL database on Azure and try to deploy the application. If you are new to the Azure portal, go through this video https://youtu.be/tgJA3-gUv2o step-by-step guide to creating Free Azure Account.
Create App Service
Connect to your Azure portal > Create Web App > Lets fill few fields
• Subscription – select your subscription (Pay-As-you-Go)
• Resource Group – Create or select Existing ( I created dnm-aspnet-sql)
• Name - select a name for your web app (I picked up dnmaspcoresqldemo).
• Publish – Code
• Runtime Stack - .NET 6 (Our sample app is .NET 6 application). you can select your own based on stack.
• Operation System – Windows
• Region – South India (Prefer closer to you)
• Pricing Plan – I selected Free (it creates new service plan)
Remaining all options from deployment, networking, Monitoring, tags you can ignore and create application.
Once the App service is created, deploy the “Sample application” to the Azure App service using the Publish Profile option from Visual Studio or any other deployment methods. For more details, I created a full end-to-end demo about What is Azure App service and how to deploy with Visual Studio and publish profile. Watch the video at https://youtu.be/1B0UsEfIfFM
Create Azure SQL Database
Connect to your Azure portal > Create resource > Create SQL Database > Lets fill few fields
• Subscription – select your subscription (Pay-As-you-Go)
• Resource Group – select resource group which we used for App service(dnm-aspnet-sql)
• Database name – learning
• Server – Create new
o Enter server name (dnmdbserver)
o Location as “South India” (for better performance you have select App service and DB server at same location)
o Authentication – select SQL Authentication. Provide admin name and password. (Copy the password we will use to update the connection string later)
• Workload Environment – Development
• Computer + Storage – DTU Based 5 Basic
• Backup storage redundancy - LRS
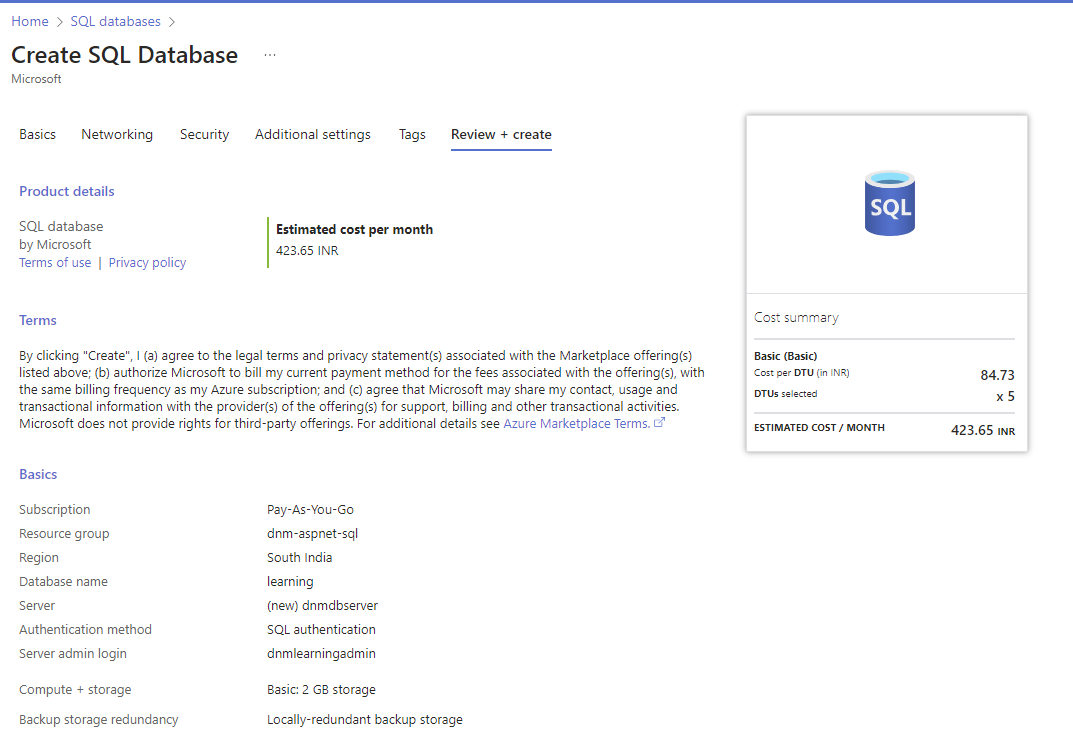
Fig 2 - Create SQL Database - Azure Portal View
Once SQL server is service is deployed, connect to SQL server and execute below script from the file https://github.com/dotnetmirror/asp-net-core-sql-db-web-application/blob/master/SQLScript.sql
To connect to Azure SQL cloud data from local SQL Server Management Studio(SSMS), you have to enable your current working computer public IP. Also, select the checkbox “Allow Azure services and resources to access this service”, this enables the App service to connect Azure SQL.
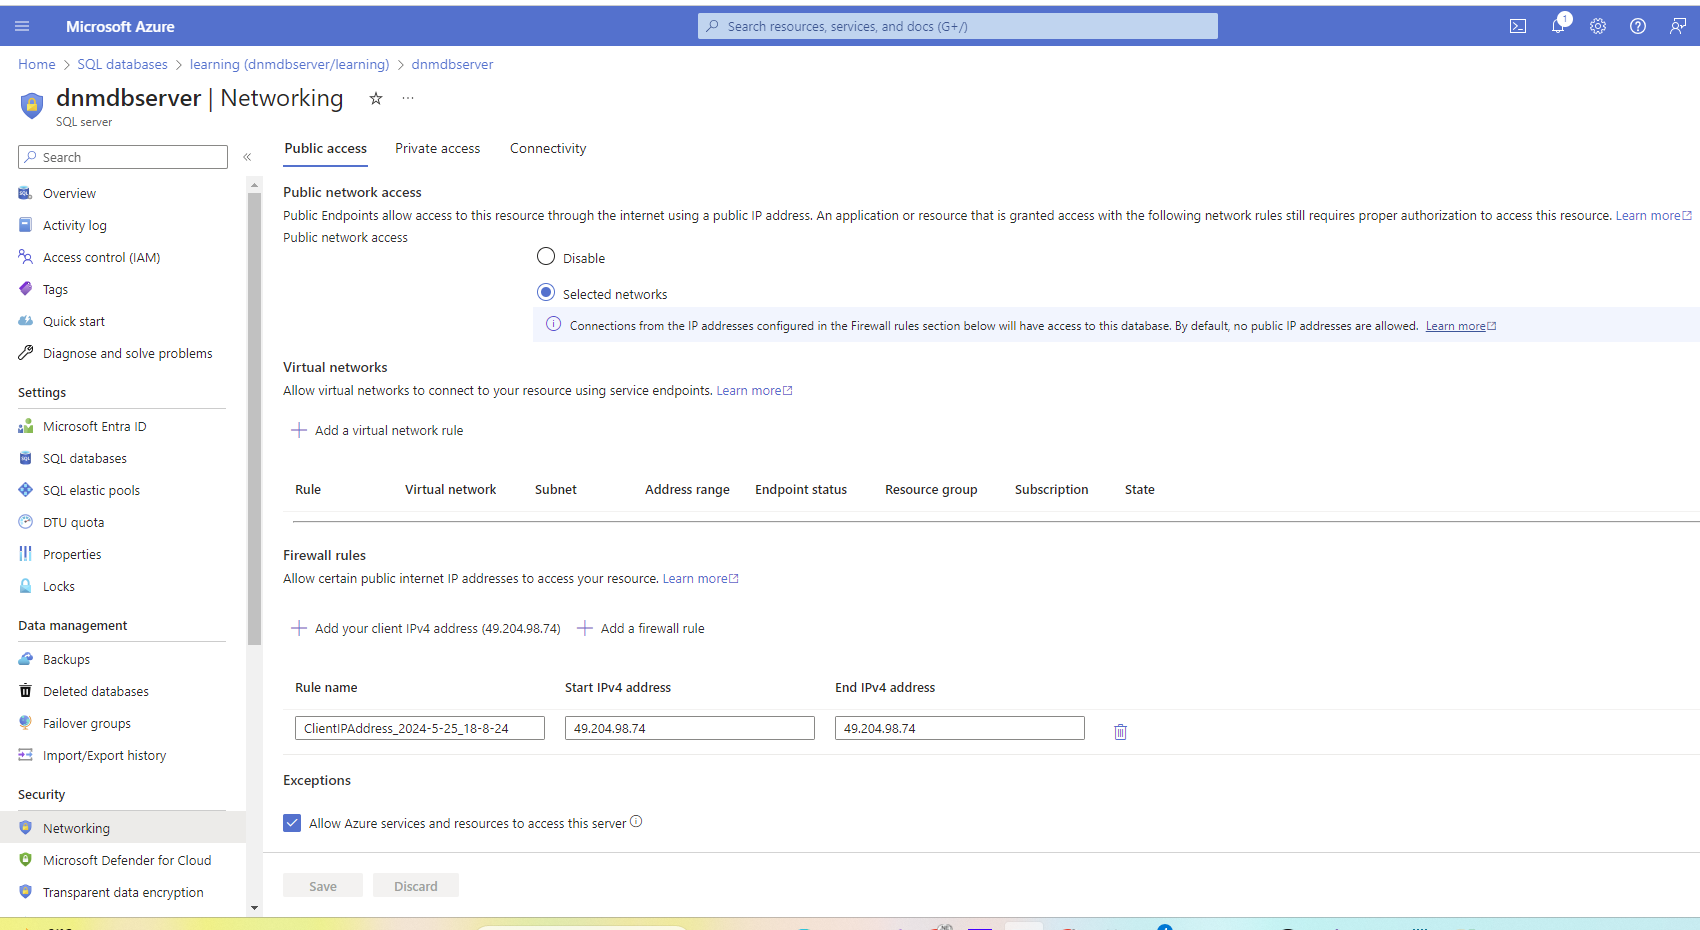
Fig 3 - Add Local IP to Azure SQL Networking to connect from local SSMS
Let’s check if SQL table script is inserted to Azure SQL Cloud database. From Azure Portal, open the created database > select “Query edition Option” > connect to the database using SQL Authentication > run the select statement to see inserted data. (Note - you can run insert script from here also instead of local SSMS)
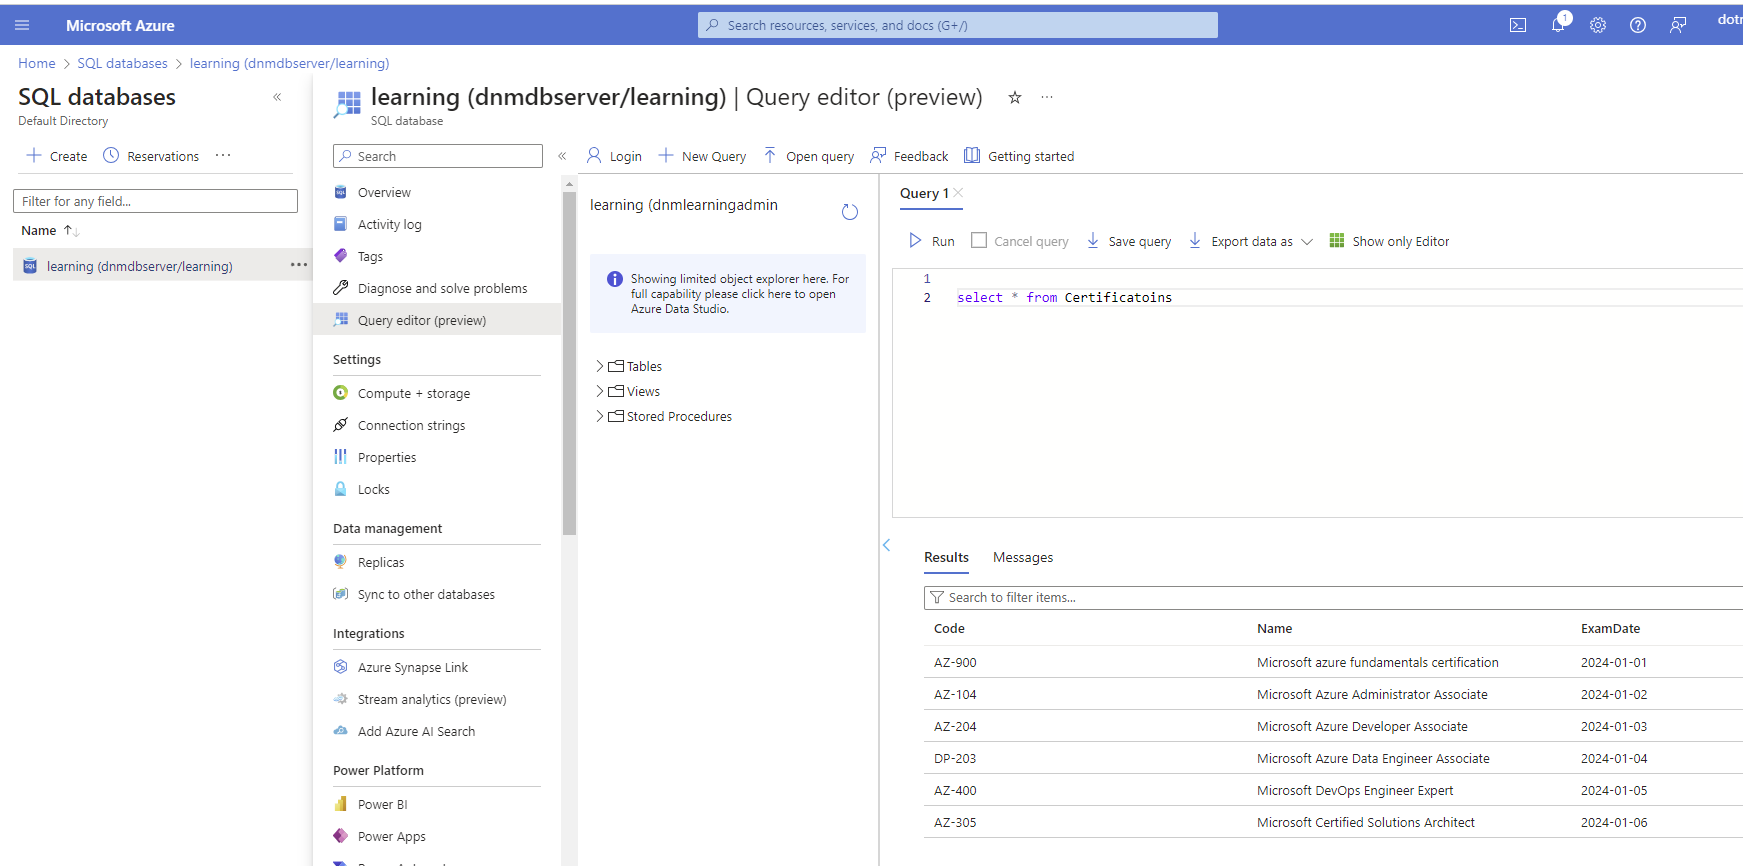
Fig 4 - inserted script data available from Azure SQL DB
App Service and Azure SQL are deployed with scripts, now let’s try to update connection string in Azure App Service to connect SQL database on Azure SQL.
Get Connection string from Azure SQL
Open Azure > Open Azure SQL Database you created > Connection string from settings blade > copy ADO.NET connection string and you have to replace {your_password} with the password you used during SQL DB creation.
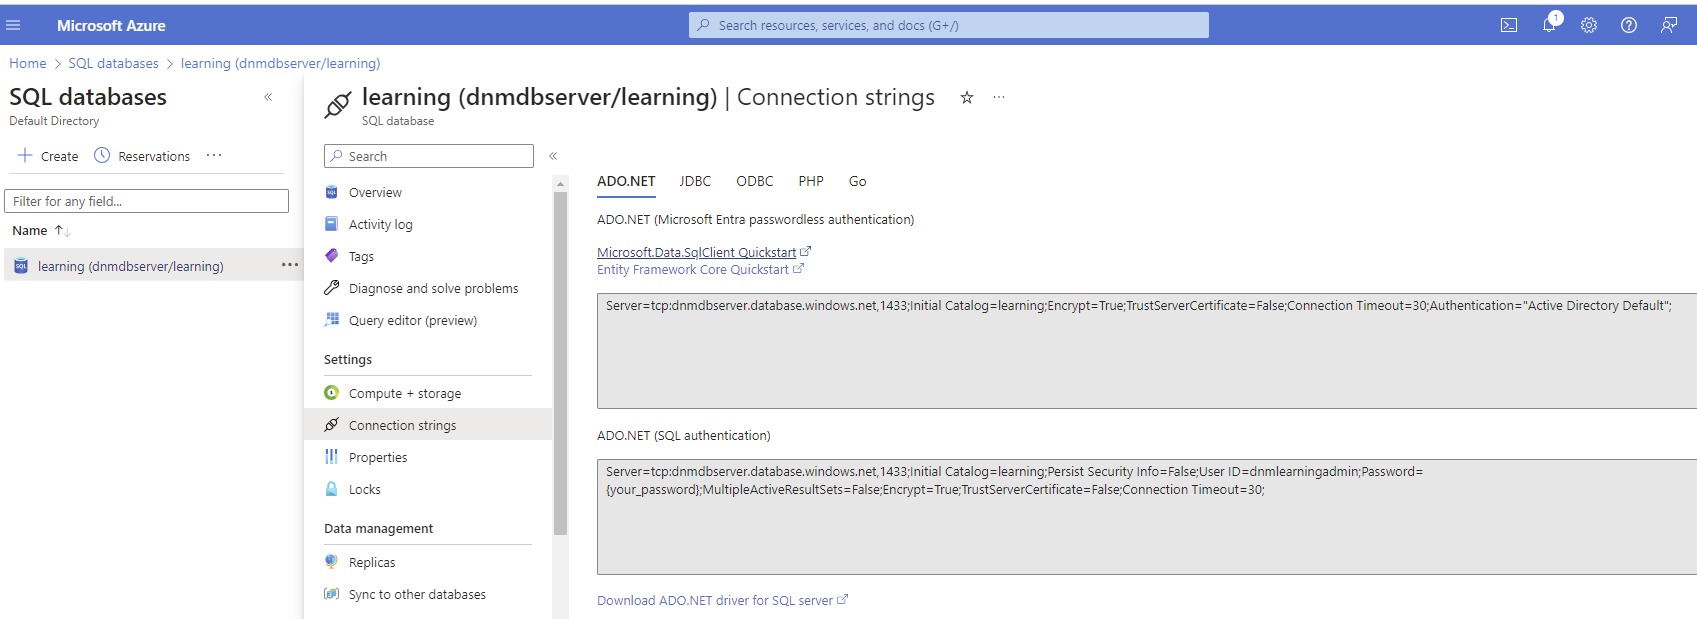
Fig 5 - Get connection string from Azure SQL DB
Add Connection string Azure App Service
Open created web app in Azure App Service > Settings blade > Environment Variables > Connection strings > add new one called “conStr” with Value as connection string. > Save.
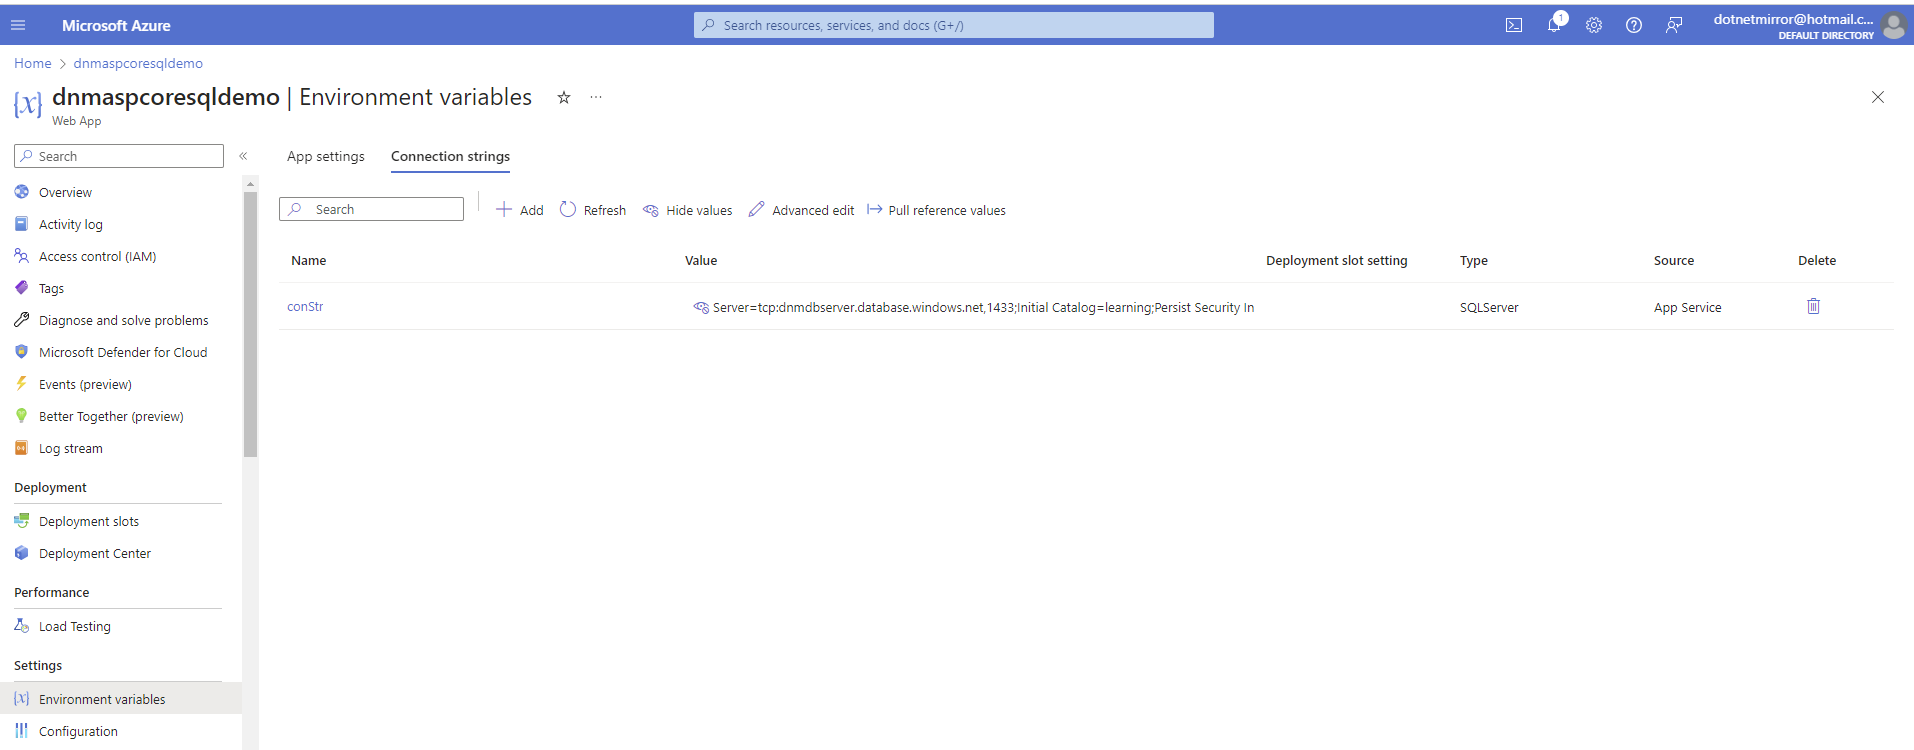
Fig 6 - Add connection string to Azure App Service via Environment Variables
Run the Application on Azure App service
Go to created Web App in Azure App Service > Open the URL and you can see certification data coming from SQL server and the URL shows clearly it from Azure App Service. From below screenshot, if you look at URL it is coming from Azure Web App and connected data from Azure SQL DB.
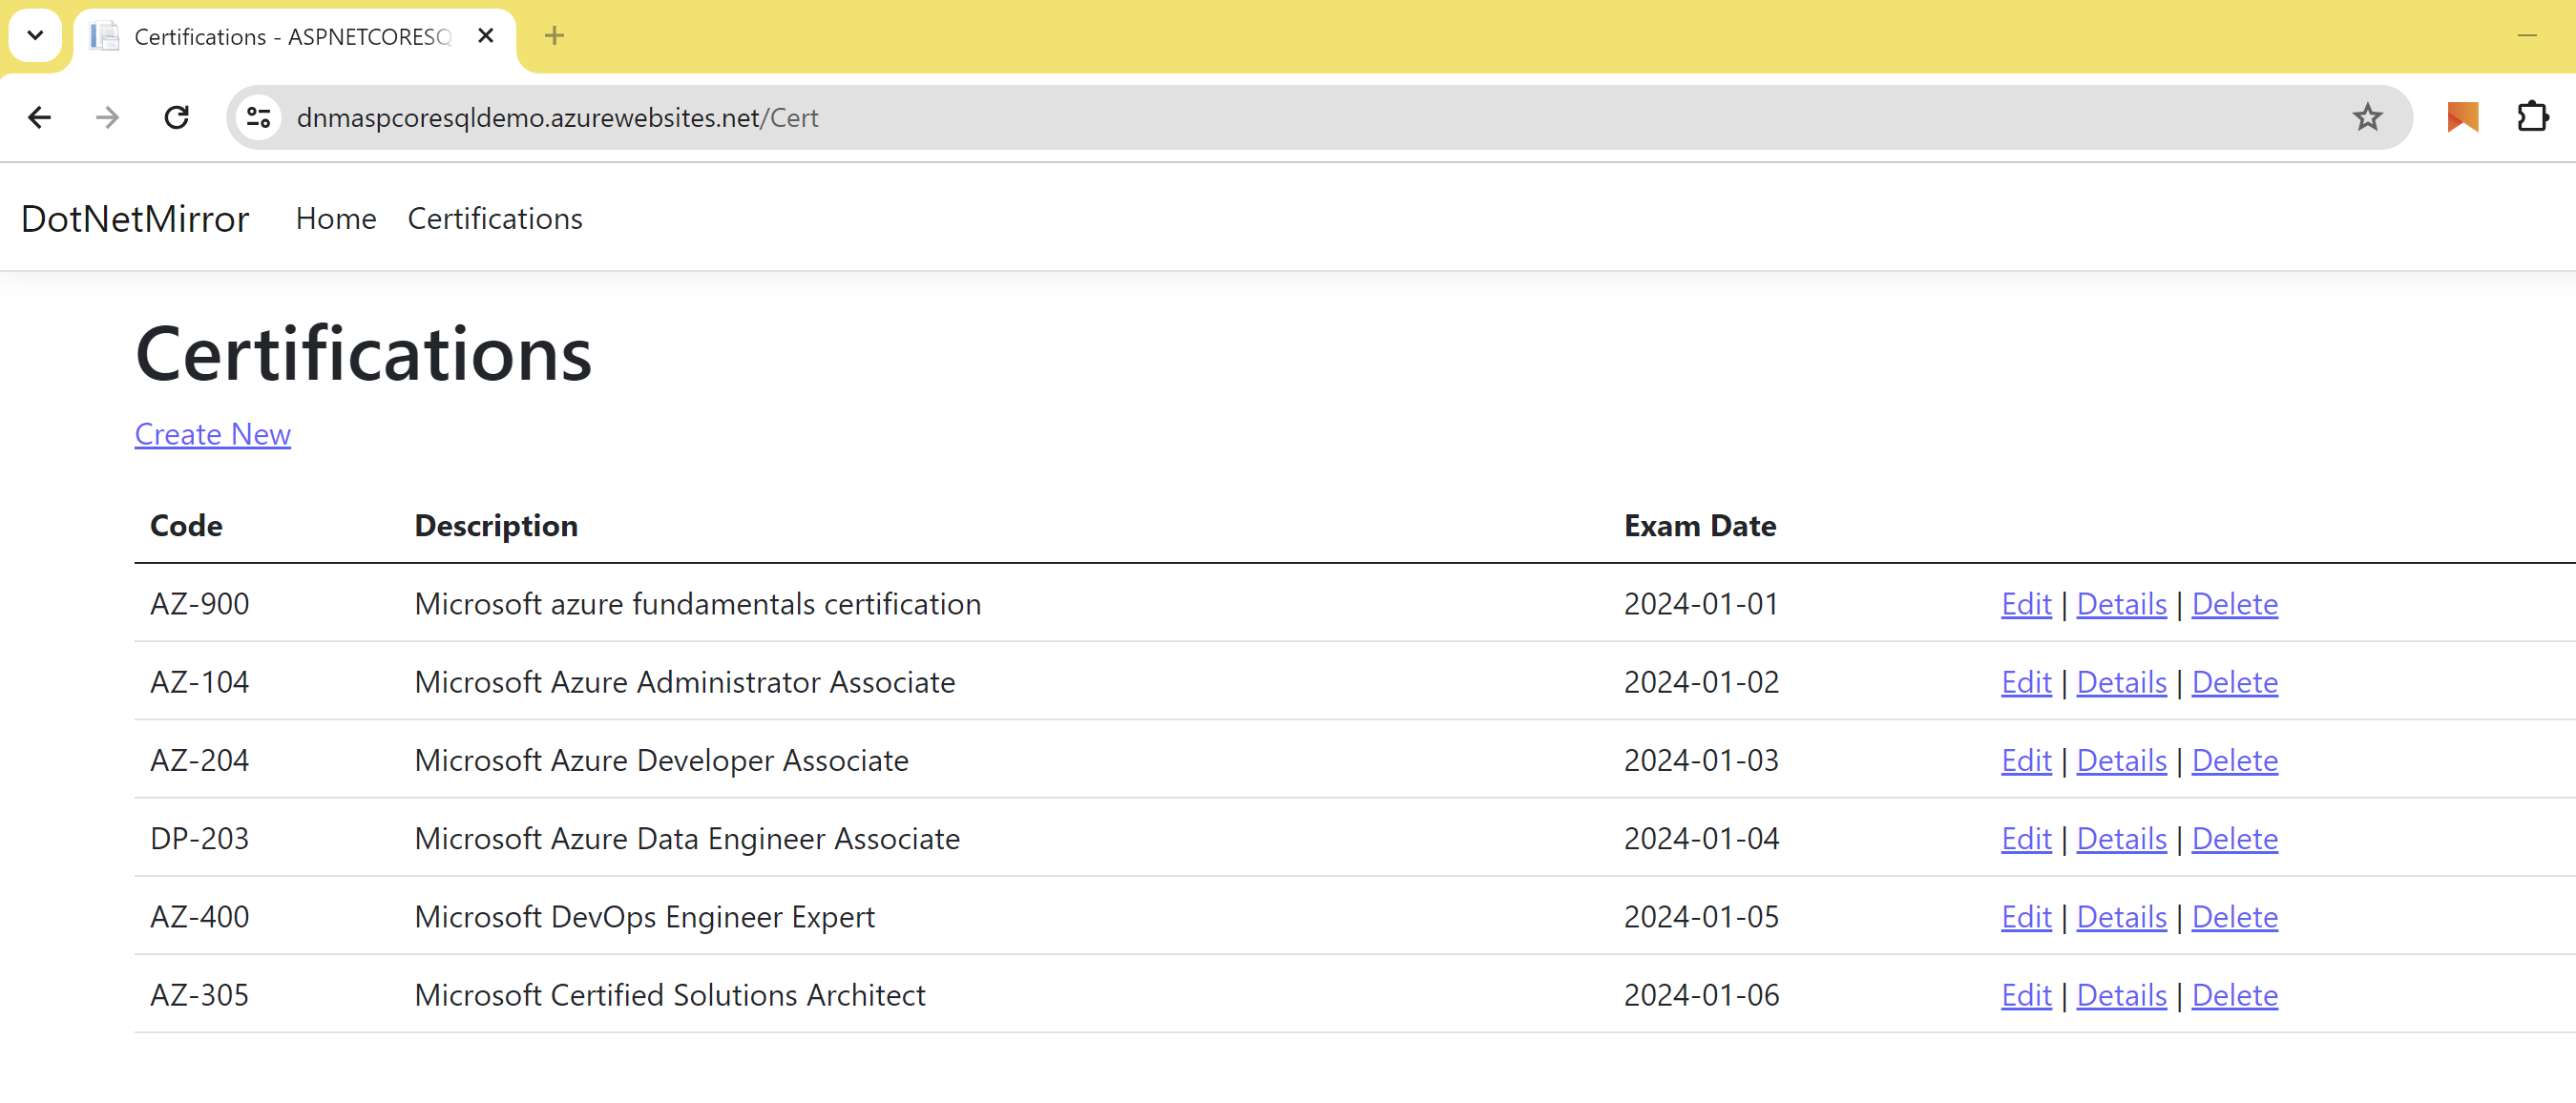
Fig 7 - Application running from Azure App Service and connected to Azure SQL DB
Delete Resources
If you do not need created azure resources, remove the Resource group. Otherwise, it incurs cost.
Conclusion
- We have cloned a sample web application from GitHub, created Azure App Service, and deployed Web App to App Service using Publish Profile.
- Created Azure SQL resource and executed sample table and insert script data to get certificates data
- Taken connection string from Azure SQL DB and updated in Azure App Service
- Application running on Azure App Service which connected to Azure SQL DB.
References