Introduction
In this post, we will see step by step guide on
- How to create Azure Function App using Visual Studio
- How to run the Azure Function App locally
- How to deploy the Function App to Azure.
Create Azure Function App using Visual Studio
Step 1 - Open Visual Studio IDE from your computer
Step 2 - Click on “Create a new project”
Step 3 - Search for “Azure Functions” project template and select “Azure Functions” from the results and click on Next button
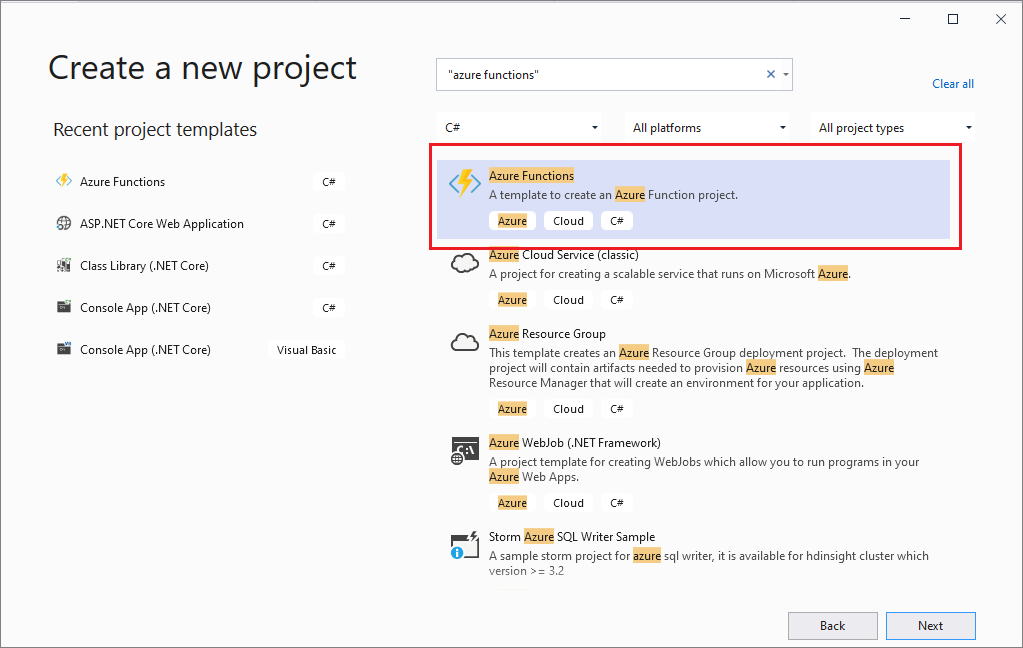
Fig 1 : Visual Studio - Azure Functions Project template
Step 4 - It opens “Create your new Azure Functions Project” window. Provide Project name, select location to save your project code and click on “Create” button
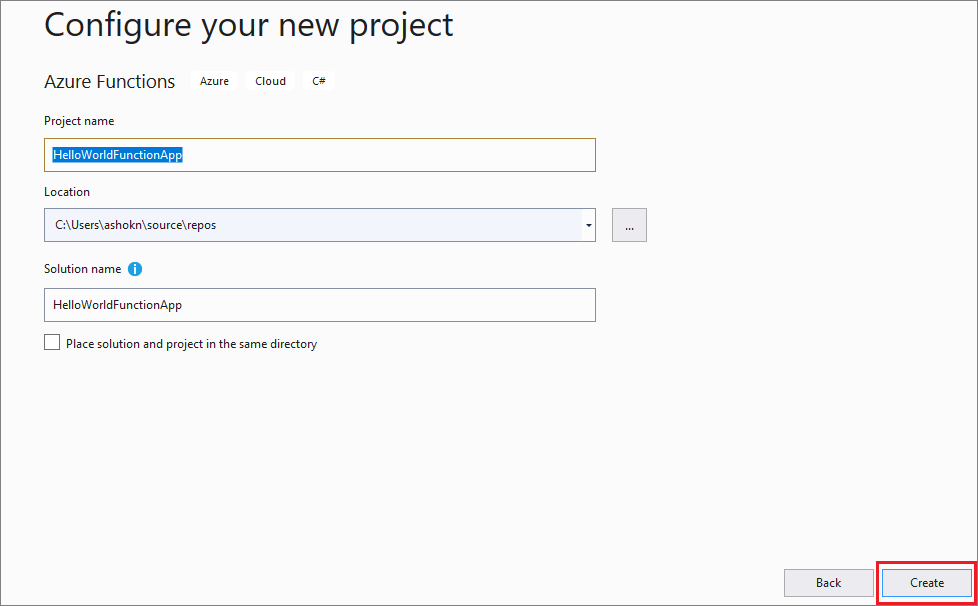
Fig 2 : Visual Studio - Create new project
Step 5 - It opens “Create a new Azure Functions application” window. Select Azure Functions V3(.NET Core) runtime, HTTP Trigger, Storage account = Storage emulator and Authorization level= Function
- Function Runtime - Azure Functions V3(.NET Core) [Other run times are Azure Functions V2 (.NET Core) and Azure Functions V1 (.NET Framework)]
- Function template - HTTP trigger (you can select any trigger you want to create)
- Storage account - Emulator (HTTP trigger does not require valid storage account whereas other triggers requires valid storage connection string)
- Authorization level - Function (It requires functions app key to invoke function. Other options are Anonymous and Admin)
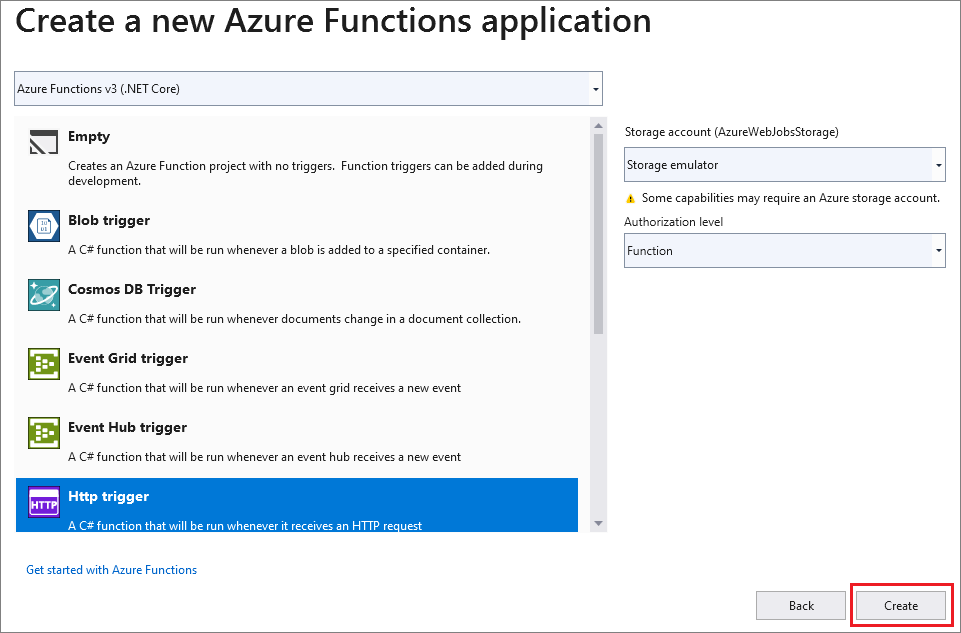
Fig 3 : Visual Studio - select Azure Functions template
Step 6 - Click on the Create button, with HTTP trigger function template visual studio creates below project structure and the key file is Functions.cs file which contains your function code.
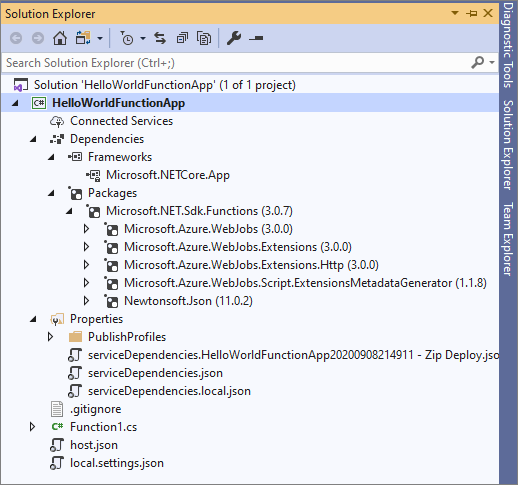
Fig 4 : Visual Studio - Azure HTTP Trigger Function Project files
Functions.cs
using System;
using System.IO;
using System.Threading.Tasks;
using Microsoft.AspNetCore.Mvc;
using Microsoft.Azure.WebJobs;
using Microsoft.Azure.WebJobs.Extensions.Http;
using Microsoft.AspNetCore.Http;
using Microsoft.Extensions.Logging;
using Newtonsoft.Json;
namespace HelloWorldFunctionApp
{
public static class Function1
{
[FunctionName("Function1")]
public static async Task<IActionResult> Run(
[HttpTrigger(AuthorizationLevel.Function, "get", "post", Route = null)] HttpRequest req,
ILogger log)
{
log.LogInformation("C# HTTP trigger function processed a request.");
string name = req.Query["name"];
string requestBody = await new StreamReader(req.Body).ReadToEndAsync();
dynamic data = JsonConvert.DeserializeObject(requestBody);
name = name ?? data?.name;
string responseMessage = string.IsNullOrEmpty(name)
? "This HTTP triggered function executed successfully. Pass a name in the query string or in the request body for a personalized response."
: $"Hello, {name}. This HTTP triggered function executed successfully.";
return new OkObjectResult(responseMessage);
}
}
}
How to Run the Function App locally
Step 7 - From Visual Studio, Click on F5 and it opens the function runtime using Azure Functions Core tools.
Step 8 - It asks to allow func.exe firewall exception to allow HTTP requests, click on Allow Access
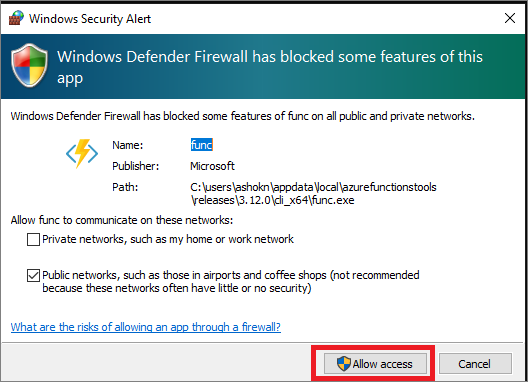
Fig 5 : Azure Function Runtime - Allow Access
After some time, function runtime provides a local host URL.
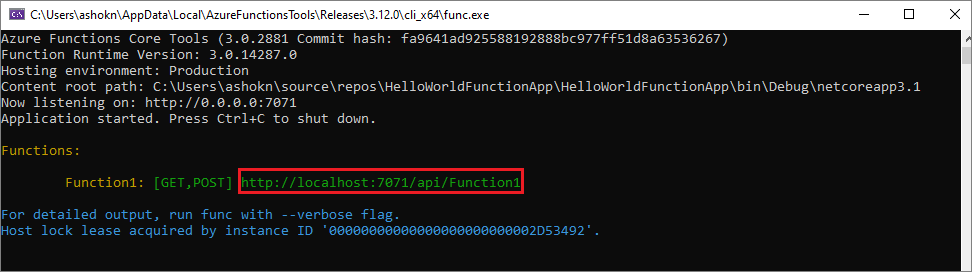
Fig 6 : Azure Function Runtime - with Function URL
Step 9 - Copy the URL from console, paste it in the browser and with the URL provide a name query string value to see the output.
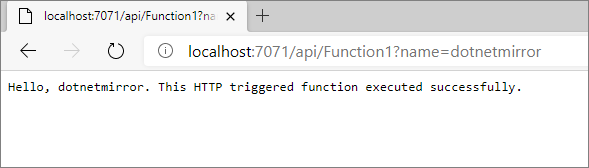
Fig 7 : Invoke Azure Function - From Browser
Now Azure function HTTP trigger is invoked and provides response to browser.
Note: While creating Function App, we selected Authorization at Function Level but Authorization is not applicable when we run the app locally.
Deploy the Function App to Azure
Step 10 - From Solution explorer, right click on project “HelloWorldFunctionApp” and select Publish Option. It opens Publish wizard and from the target tab, select Azure.
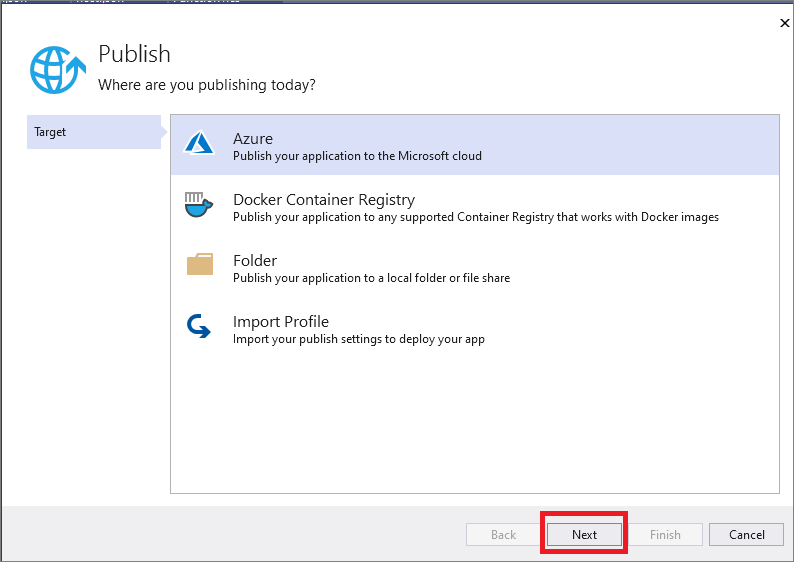
Fig 8 : Azure Function Publish - Select Target
Step 11 - Select “Azure Function App(windows)” as a specific target. Click on the Next button.
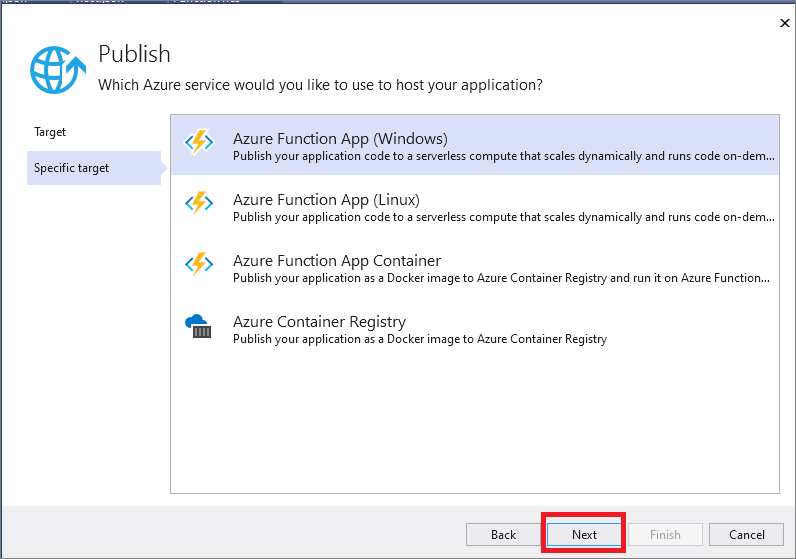
Fig 9 : Azure Function Publish - Select Specific Target
Step 12 - Once you login to your Azure account in visual studio, it shows the existing Function apps to select from your subscriptions or we can create a new function app. Click “Create a new Azure Function” link
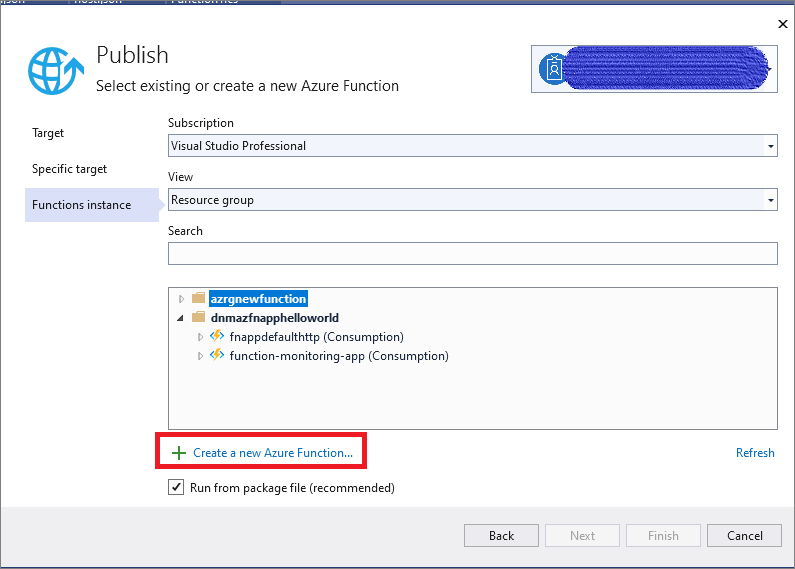
Fig 10 : Azure Function Publish - Create a new Function App
Step 13 - It opens "Create new Function App" window and pre-populates with few values
- Name - Function App Name
- Subscription- Select your Azure subscription
- Resource group - select existing or you can create new one
- Plan Type - Consumption (other plans are App service and Premium)
- Location - Location to deploy your app. Select nearest location.
- Azure Storage - required for Function App

Fig 11 : Azure Function Publish - Create a new Function App with details
Step 14 - Click on Create button and it takes back you to Publish wizard and select Finish button.

Fig 12 : Azure Function Publish - Create a new Function App Finish step
Step 15- Click on Publish button if everything looks fine.
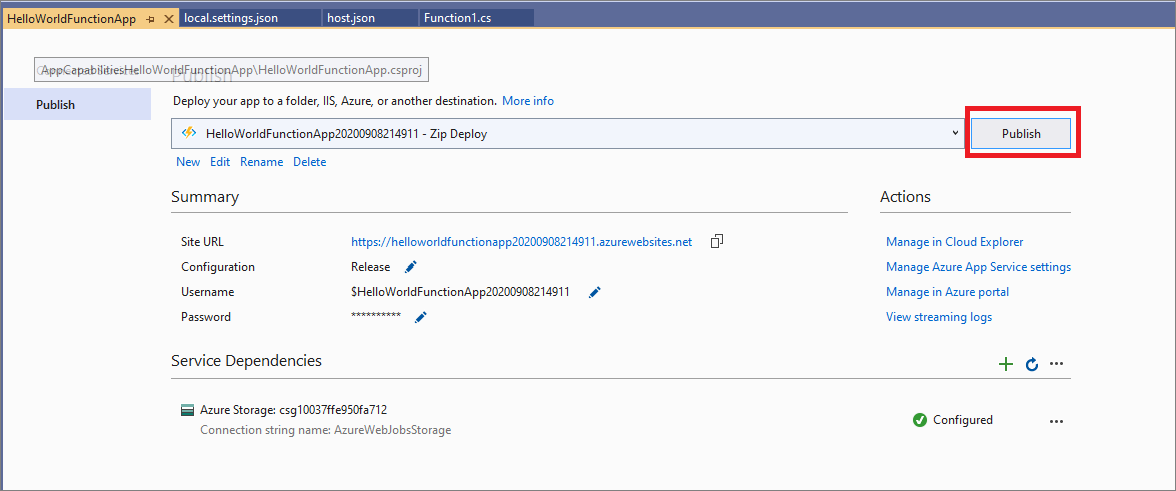
Fig 13 : Azure Function Publish - To Azure
After sometime, you can see Publish succeeded message from output window.
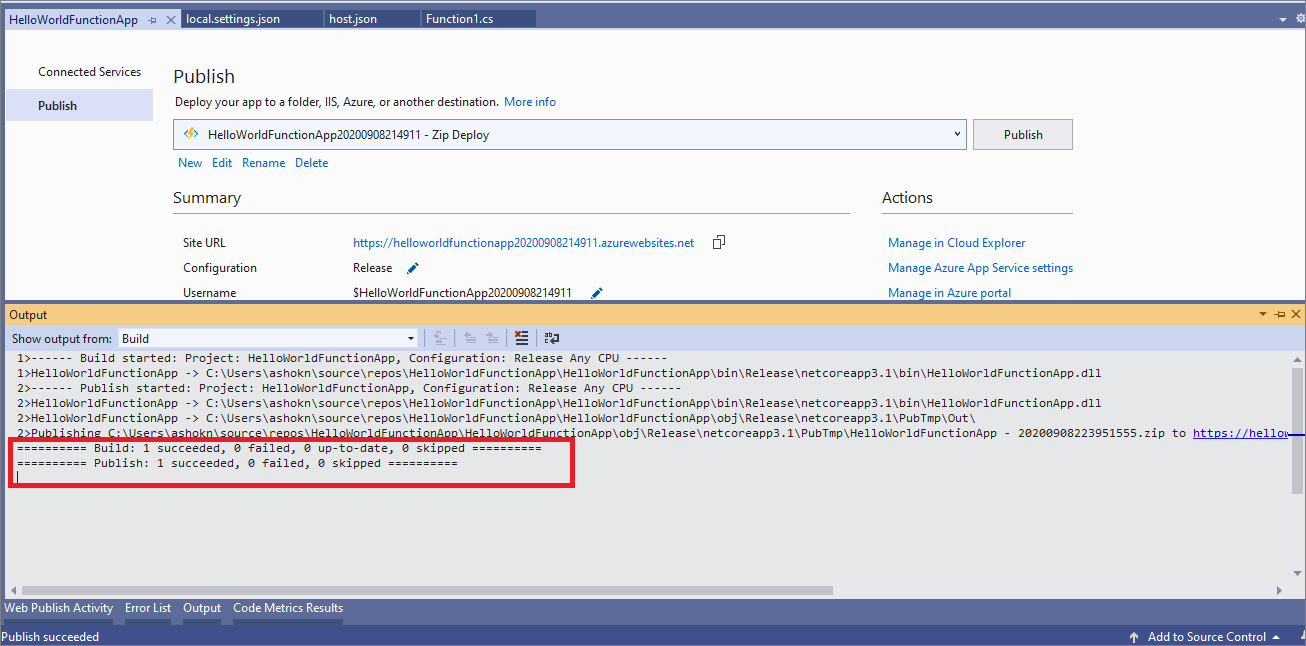
Fig 14 : Azure Function Publish - Succeeded
Step 16- Now try to access the URL from the browser ( https://helloworldfunctionapp20200908214911.azurewebsites.net/api/Function1?name=dotnetmirror ) you will 401 unauthorized because we defined Authorization Level= Function and function key is not passed in URL.
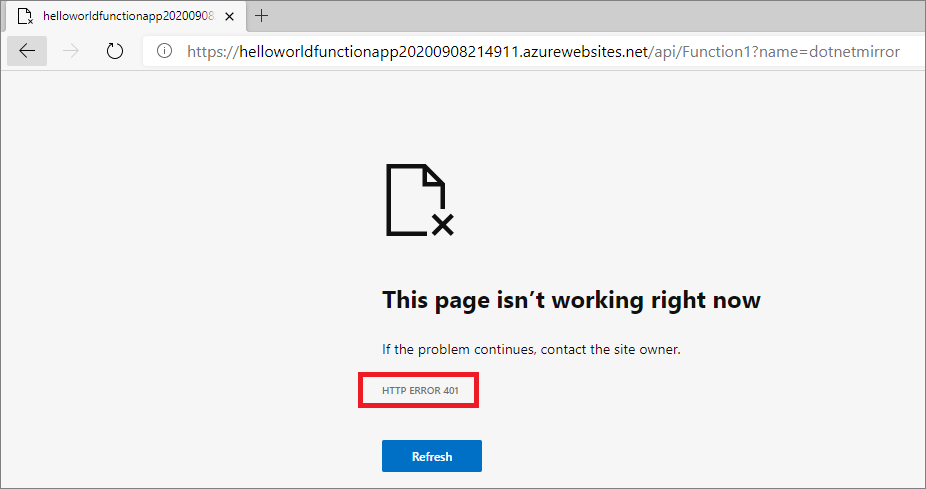
Fig 15: Deployed Azure Function App - 401 Unauthorized
Step 17- Login to Azure portal and navigate to created function. From Function Keys under Development tab, you can get Function Key of your App.
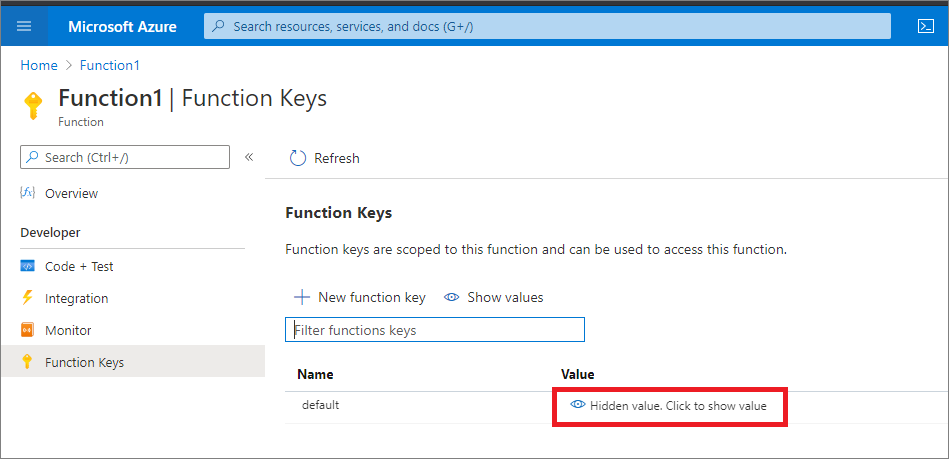
Fig 16: Deployed Azure Function App - Get Function App Key
Step 18 - Now try to access the URL from the browser with code={Function Key} (https://helloworldfunctionapp20200908214911.azurewebsites.net/api/Function1?code={function key}&name=dotnetmirror ) and you should get "Response" from your Function App.

Fig 17: Deployed Azure Function App - Access with Function App Key
Happy Learning on Azure Functions!